
My husband and I both have a really traditional/contemporary style when it comes to our home and decorating it. We've been finding in our search for a home, that the house we desire is well out of our price range. Our dream would be to own an old stone farmhouse on a 6 acre lot, sprinkled with fireplaces and decades of character. One that is still within reasonable distance to a large city center. I always say, "When we're rich....(fill in the blank)."
Although our dream home may take years to save up for, and realistically could never happen, its about making the place you are the place you want to be. I'm always trying to find budget friendly ways to have a million-dollar style. In my opinion, the bedroom is one of the main places I want to feel at home. There is nothing that says sophistication quite like a great big fancy headboard, right? This post is one of the first projects on my personal list of DIY's.
Things you'll need:
1/4" Plywood
2-3" Foam backing
Batting
Durable fabric
Black marker
Pencil
Pencil
Stapler w/ 1/4" staples
Scissors
Jigsaw
Flush mounts
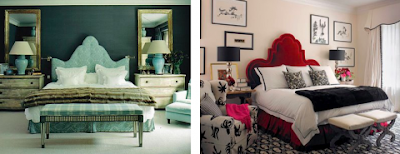 | |||||
| Two of my favorite headboards. |
Find the style headboard you'd like. If you're not as traditional as I am, then you could go with a regular rectangle or maybe a triangle shape. The great thing about doing it yourself is that your have lots of options, so definitely use the fabric as a way to take your headboard someplace special. Anything from leather to floral.

First, measure the width of your bed. The headboard should be a little wider than your mattress. Then, decide the height you'd like to have your headboard. With these two measurements, have a piece of basic 1/4" plywood cut to that size by your local home improvement store. Trace the design you have chosen onto the plywood with a pencil (remembering to keep the bottom rectangular, unless you're cutting out legs as well) and cut it out using a jigsaw. When that is finished, be sure to sand the edges to get rid of splinters and sharp edges.
Next, lay your cut headboard on top of your piece of 2" thick foam and trace the shape with a black marker. Cut that piece out. Then, cut out your batting, making sure that you have at least 6" extra of batting to wrap around the foam and plywood (same with the fabric as well. )
Now it's time to put it all together. Make sure to have a clean, flat surface to work with. Place the fabric (design side down) flat on the ground. Next, place the batting evenly on top of the fabric. Then place the foam in the center of the batting, and add the plywood right on top. Pull the fabric and batting up and over the plywood. Now put 2 staples in the center of each side. Check the front to make sure your material is centered the way you wanted. If it's looking good, then continue to staple the batting and fabric together up and over the plywood every 2" inches the entire way around the inner edge of your headboard.
All that's left is to trim the excess material off the back with scissors, and you've got yourself a custom made headboard!
I've read that it's a good idea to use flush mounts to make sure your headboard doesn't smack off the wall every time you move in bed. Simply find your wall studs and fasten the flush mounts to them and your headboard. Connect.
*****************************************
If you'd like to think outside of the conventional headboard, consider the following ideas:
 |
| Try a grand old mantel piece. |
 |
| Or a rustic set of shutters. |
 |
| A canopy could add some romance. |
 | |
| Also, wall decals are a playful touch. |
I learned how to do this project on
http://www.bejane.com/diy-projects/by-topic/carpentry/make-your-own-upholstered-headboard
Enjoy!
No comments:
Post a Comment